What steps are required:
Step 1
Click in the toolbar on Upload invoices and then on Upload PDF invoices.
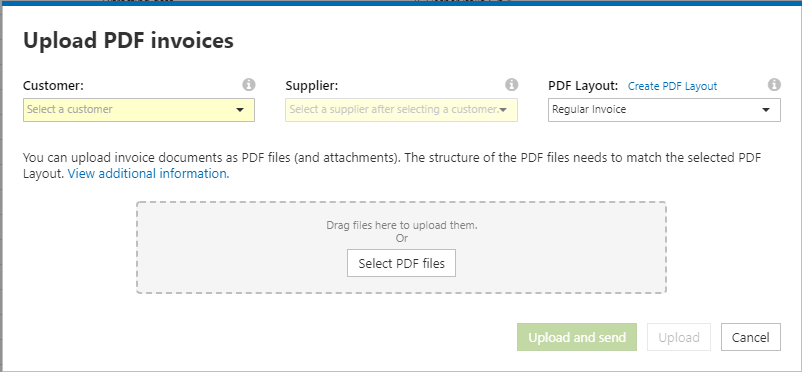
The Upload PDF invoices dialog window is displayed.

Step 2
Select from the following mandatory fields:
Customer: Select the organizational unit of the customer, for which the invoice is intended.
Supplier: Select the unit in your company, for which the invoice is to be generated.
PDF layout: Select the appropriate invoice layout.
Step 3
Click on Select PDF files to upload one or more PDF invoices, from which the structured invoice data is to be extracted.
You can also add one or more files as attachments to each PDF invoice. The attachments must comply with the rules defined by the customer, for example with reference to the selected file types, the number and size of the attachments, etc.
a) Click on Upload.
Use this option if you want to check and edit the invoice. We recommend you begin with the "Upload" and after a period of positive tests change to "Upload and send".
During the processing of the uploaded invoice by the system, this is on the Draft tab in the Extraction data. This can take up to 48 hours.
The invoice is then available under the Ready to send tab. You can edit the invoice and send it to the customer. If an error occurred during the processing, the invoice stays on the Draft tab.
- or -
b) Click on Upload and send.
During the processing of the uploaded invoice this is on the Sent tab in the Processing status. This can take up to 48 hours. The invoice is then available under the Sent tab.
Error-free invoices are sent directly to the customer. If an error occurred during the processing, the invoice is given the Error status. The invoice with errors is not sent to the customer. To page error processing